Table of Contents
Open Table of Contents
Intro
When it comes to code reviews, nothing beats an experienced software engineer with project context. Unfortunately, our team members often have many demands on their time.1
AI might just be the buzziest buzzword in today’s tech industry, and while I’d agree that much of the hype is egregiously blown out of proportion, I do think any developer who’s used GPT-4 to assist them in the process of working on software will testify to specific use cases where it comes in handy.2
The best part of automated code reviews as part of a GitHub Actions pipeline is that it’s completely passive.
With ChatGPT, CodeGPT, Claude or other AI coding tools, to leverage the power of the trusty Language Learning Models, you have to make a conscious effort to craft the perfect prompt and give the right context for your question in hopes of receiving a magical response to help you in the right direction.
This workflow requires none of that. Just commit your code and create a PR like usual. The rest will be taken care of. And if the reviews are completely devoid of help, or full of hallucinations, as GPT is prone to do, just ignore it!
How it works
The AI Code Reviewer GitHub Action retrieves the pull request diff, filters out excluded files, and sends code chunks to the OpenAI API. It then generates review comments based on the AI’s response and adds them to the pull request.
If you’re familiar with GitHub Actions, you can find all the information you need at the marketplace link here. Everything you need is in the README – enjoy!
For those of you who’d like a step-by-step walkthrough, let’s get started.
OpenAI API token & model
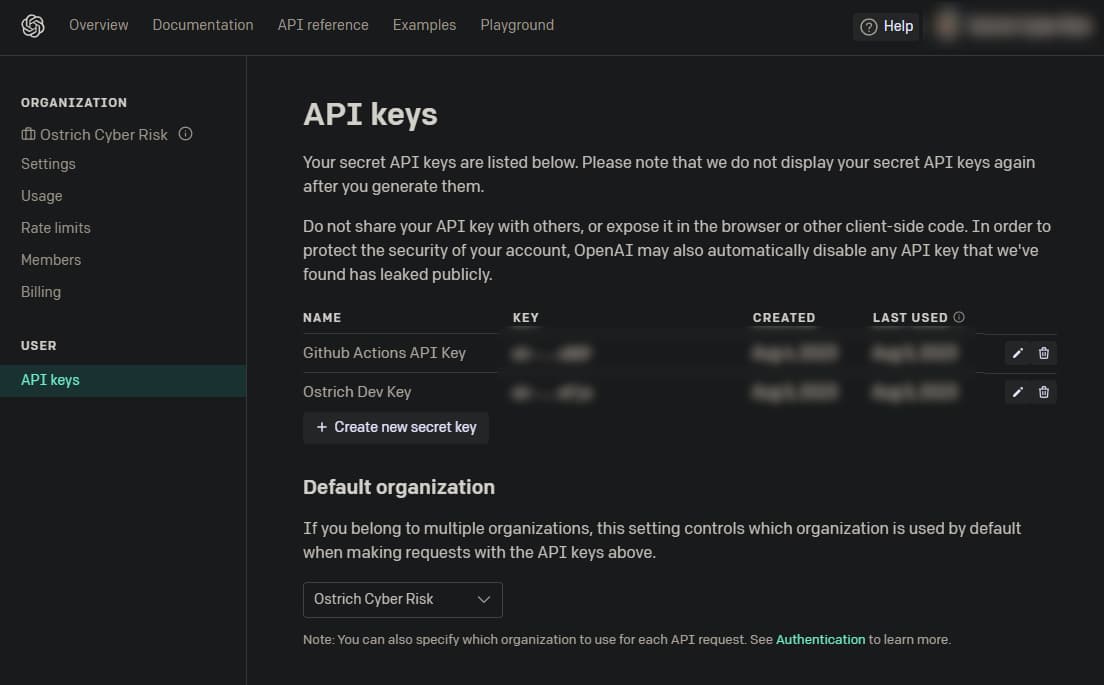
To use this GitHub Action, you need an OpenAI API key. If you don’t have one, sign up for one here.
After you’ve signed up and set up billing, generate your API key and store it somewhere safe. You’ll need to store it in your GitHub Secrets, which we’ll go over later.

At the time of writing, new signups for the OpenAI API are granted immediate access to the gpt-3.5-turbo model, which is capable of providing valuable code reviews.
The gpt-4 model is available to users who have been enrolled for at least one month and have made a payment of $1 or more.3
Once you gain access to the gpt-4 model, I highly recommend switching to it and evaluating its suitability for your specific needs and budget.
GitHub API Token
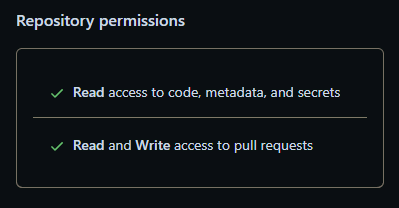
This GitHub Action requires access to your repository code and pull requests, so it can read the content to review and make comments accordingly.

To create a GitHub API token with the necessary permissions, follow these steps:
- Go to your GitHub account settings.
- Click on Developer settings in the left sidebar.
- Select Personal access tokens from the submenu.
- Choose Fine-grained tokens or Tokens (classic) depending on your preference.
- Click on the Generate new token button.
- Give your token a descriptive name and select the desired permissions. For this action, make sure your token has the
repoandpull_requestspermissions. - Click on the Generate token button.
- Copy the generated token and store it securely.
For more detailed instructions, you can refer to the GitHub documentation.
Tokens for an Organization Repository
If you’re setting up this action on a GitHub repository that belongs to an organization, make sure you consult with a user with the Owner role in the GitHub Organization.

In the Organization’s Settings page, find Third-party Access on the settings sidebar, and enable Fine-grained personal access tokens under the “Personal access Tokens” option.

This may require administrator approval, but after this is successfully set up, just follow the steps above. The rest of the process is the same as creating a personal token, except when creating the token, under "Repository Access" (I recommend choosing "Only select repositories"), be sure to select the Organization’s repository for which you’d like to set up this GitHub Action.
GitHub Actions Secrets & Workflow file
Now that you have your OpenAI API key and GitHub API token, you can set up the GitHub Action.
GitHub Secrets
You’ll want a secure way to store these tokens so not even you can access them later on. In the settings for your repository, navigate to Actions secrets and variables.
https://github.com/[owner]/[repo-name]/settings/secrets/actions
Add your two tokens with New repository secret. For the OpenAI token, use OPENAI_API_KEY and use OCTOKIT_TOKEN for the GitHub token (GitHub doesn’t like it if you start your tokens with GITHUB_).

Actions Workflow file
Now that you have your tokens stored securely, you can create a workflow file to use the GitHub Action.
Create a new file in your repository at .github/workflows/ai-code-review.yml with the following contents:
#.github/workflows/ai-code-review.yml
---
name: GPT Code Review

on:
  pull_request:
  workflow_dispatch:
permissions: write-all
jobs:
  review:
    runs-on: ubuntu-latest
    steps:
      - name: Checkout Repo
        uses: actions/checkout@v3

      - name: AI Code Reviewer
        uses: Ostrich-Cyber-Risk/ai-codereviewer@main
        with:
          OCTOKIT_TOKEN: ${{ secrets.OCTOKIT_TOKEN }}
          OPENAI_API_KEY: ${{ secrets.OPENAI_API_KEY }}
          OPENAI_API_MODEL: "gpt-3.5-turbo-16k" # Optional: defaults to "gpt-4"
          exclude: "**/*.json, **/*.md" # Optional: exclude patterns separated by commas
---
This workflow file will run the GitHub Action on every pull request and on demand. You can customize the workflow to your liking. For more GitHub Actions workflow information and syntax help, visit their docs.
Conclusion
Now that you’ve set up the GitHub Action, you’re ready to go!
Simply commit & push this workflow file, and check out the Actions tab on your GitHub repo to see the AI code reviewer in action.
Feel free to make pull requests, suggestions, or bring up issues on the GitHub page for this action, and let me know in the comments what project you’ll be using this on first, or simply share your thoughts on how helpful you found this tool.
Happy Coding!
Footnotes
1. Reddit - Why is it so hard to get people to review my PRs?
2. Pluralsight - How to use ChatGPT to write code
3. OpenAI - GPT-4 API general availability